~/contents
Updated 11/30 - Added Colorduino
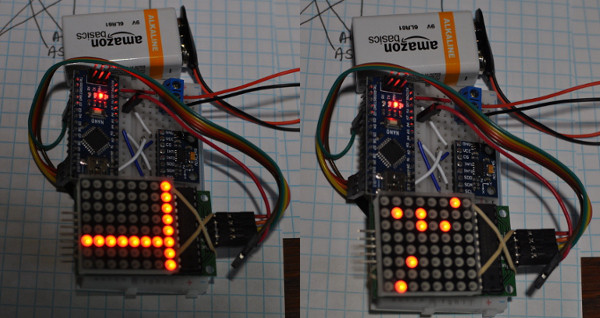
I picked up this accelerometer to attempt a LED sand-style physics toy. These 1088AS cathode matrixes are cheap and good for tinkering. I used the LedControl library and Adafruit’s ADXL345 library to create a basic version to start.
Frame Animation
The first cycles through a frame animation each time the device is tilted, resulting in a vertical line that moves left or right and is constrainted by the edges of the matrix. This shows how to iterate over an array of frames. The limitations of frame animation quickly become apparent when you try to add a second vertical line, but here’s the code. Unfortunately I don’t remember who it is adapted from, I will credit if I rediscover the link.
#include "LedControl.h"
#include <Wire.h>
#include <Adafruit_Sensor.h>
#include <Adafruit_ADXL345_U.h>

/* Assign a unique ID to this sensor at the same time */
Adafruit_ADXL345_Unified accel = Adafruit_ADXL345_Unified(12345);
LedControl lc=LedControl(12,10,11,1);  // Pins: DIN,CLK,CS, # of Display connected
unsigned long delayTime=200;
int prev_y = 0;
int currentFrame = 0;

byte a[8]={B11111111,B00000000,B00000000,B00000000,B00000000,B00000000,B00000000,B00000000};
byte r[8]={B00000000,B11111111,B00000000,B00000000,B00000000,B00000000,B00000000,B00000000};
byte d[8]={B00000000,B00000000,B11111111,B00000000,B00000000,B00000000,B00000000,B00000000};
byte u[8]={B00000000,B00000000,B00000000,B11111111,B00000000,B00000000,B00000000,B00000000};
byte i[8]={B00000000,B00000000,B00000000,B00000000,B11111111,B00000000,B00000000,B00000000};
byte n[8]={B00000000,B00000000,B00000000,B00000000,B00000000,B11111111,B00000000,B00000000};
byte o[8]={B00000000,B00000000,B00000000,B00000000,B00000000,B00000000,B11111111,B00000000};
byte z[8]={B00000000,B00000000,B00000000,B00000000,B00000000,B00000000,B00000000,B11111111};
byte* frameArray[] = {a,r,d,u,i,n,o,z};

void setup(){
  Serial.begin(9600);
  lc.shutdown(0,false);  // Wake up displays
  lc.setIntensity(0,5);  // Set intensity levels
  lc.clearDisplay(0);  // Clear Displays

  /* Initialise the sensor */
  if(!accel.begin())
  {
    /* There was a problem detecting the ADXL345 ... check your connections */
    Serial.println("Ooops, no ADXL345 detected ... Check your wiring!");
    while(1);
  }
  accel.setRange(ADXL345_RANGE_16_G);
}

//  Displays next frame
void cycle_animation(){
  for (int i = 0; i < 8; i++)
  {
    lc.setRow(0,i,frameArray[currentFrame][i]);
  }
  delay(delayTime);
}

void loop(){
  sensors_event_t event;
  accel.getEvent(&event);
  int y_diff = (event.acceleration.y);
  if(y_diff > 1 || y_diff < -1){
    if(y_diff > 1){
      currentFrame--;
    }
    else{
      currentFrame++;
    }
    currentFrame = constrain(currentFrame,0,7);
    cycle_animation();
  }
}
Dynamic Display
I knew if I wanted to do anything more complex I’d need a different approach. My next program creates a dot that moves across the matrix based on how it is tilted. The code was adapted from Reid Paulhus’ Visual Accelerometer. Reid uses ADXL345 directly, but I continue to use Adafruit’s library and I make the dot larger. This dynamic toy is more fun to play with than the frame-animated toy, and I can use the basic principle to make other, more complex patterns.
#include "LedControl.h"
#include <Wire.h>
#include <Adafruit_Sensor.h>
#include <Adafruit_ADXL345_U.h>

/* Assign a unique ID to this sensor at the same time */
Adafruit_ADXL345_Unified accel = Adafruit_ADXL345_Unified(12345);
LedControl lc=LedControl(12,10,11,1);  // Pins: DIN,CLK,CS, # of Display connected
unsigned long delayTime=200;

class Particle {
  public:
    int x = 0;
    int y = 0;
};
Particle *p;

void setup(){
  p = new Particle();

  Serial.begin(9600);
  lc.shutdown(0,false);  // Wake up displays
  lc.setIntensity(0,5);  // Set intensity levels
  lc.clearDisplay(0);  // Clear Displays

  /* Initialise the sensor */
  if(!accel.begin())
  {
    /* There was a problem detecting the ADXL345 ... check your connections */
    Serial.println("Ooops, no ADXL345 detected ... Check your wiring!");
    while(1);
  }
  accel.setRange(ADXL345_RANGE_16_G);
}

void loop(){
  sensors_event_t event;
  accel.getEvent(&event);
  int y_diff = event.acceleration.y;
  int x_diff = event.acceleration.x;

  if(y_diff >= 1 || y_diff <= -1){
    if(y_diff > 1){
      p->y++;
    }
    else{
      p->y--;
    }
    p->y = constrain(p->y,0,6);
  }

  if(x_diff >= 1 || x_diff <= -1){
    if(x_diff > 1){
      p->x++;
    }
    else{
      p->x--;
    }
    p->x = constrain(p->x,0,6);
  }

    lc.clearDisplay(0);
    lc.setLed(0,p->x, p->y, true);
    lc.setLed(0,p->x+1, p->y, true);
    lc.setLed(0,p->x, p->y+1, true);
    lc.setLed(0,p->x+1, p->y+1, true);
    delay(100);
}
Multiple Dynamic Patterns
From there, it’s easy to adapt the concept to include several different kinds of displays that can be toggled by a button. In addition to the dot, which is bounded, I added several line patterns which wrap around the screen (both negative and positive space) and a star field pattern. I experimented with several others but found the more basic patterns were the most fun to play with.
I ran into my first hardware limitation when I began to work on the star field. I wanted to create “comets” that had faded LEDs for tails. I quickly realized that while I could use LedControl to dim the entire display, I couldn’t dim individual LEDs. The best I could do was have the stars flicker. There are multiple MAX7219 libraries out there and I hoped to find something that would target the LEDs in a way similar to LedControl’s setLed method but it sounds like the MAX7219 cannot dim individual LEDs without discrete multiplexing control.
Gesture Control
While preparing a prototype I decided to try to ditch the physical switch button for some type of gesture control. It makes more sense for a physics toy and it’s one less thing to wire so thumbs up. I was inspired by maker_studio’s cool DIY A Magic Light Box, which uses a forceful shake to turn on and off, and changes colors based on how the cube is rotated. There are interesting resources on gesture recognition, like mellis’ Gesture Recognition Using Accelerometer and ESP, but I decided to keep it simple. I switched over to SparkFun’s ADXL345 Arduino Library, which supports the ADXL345’s native ability to detect interupts like tap, double tap, and free fall.
I actually couldn’t get freefall to register for whatever reason, but it was easy to set up tap and double-tap recognition. Originally I thought I would have the matrix go to “sleep” on double-tap, but it was a too easy to accidentally trigger a pattern change or sleep by mistake. I ultimately chose to have the pattern change on double-tap and the display goes to sleep after 30 seconds of inactivity.
#include <LedControl.h>
#include <Wire.h>
#include <SparkFun_ADXL345.h>
LedControl lc=LedControl(12,10,11,1);  // Pins: DIN,CLK,CS, # of Display connected
ADXL345 accel = ADXL345();

class Star {
  public:
    int x = random(0, 7);
    int y = random(0, 7);
    int wait = 100;
    void calculateMove(int y_diff, int x_diff, int max_width, boolean constrained, boolean respawn);
    void singleDot(int y_diff, int x_diff);
    void twoLines(int y_diff, int x_diff, boolean invert);
};

void Star::calculateMove(int y_diff, int x_diff, int max_width, boolean constrained, boolean respawn){
  if(y_diff >= 1 || y_diff <= -1){
    if(y_diff > 1){
       y++;
    }
    else{
      y--;
    }
  }
  if(x_diff >= 1 || x_diff <= -1){
    if(x_diff > 1){
      x++;
        }
    else{
      x--;
      }
    }

  // if the pixel is constrained it stops at the edge
      if(constrained){
        y=constrain(y,0,max_width);
        x=constrain(x,0,max_width);
      }
  // if the pixel is not constrained it wraps to the opposite side...
      else {
          if(y < 0){
              y = max_width;
  // ....and if it respawns, it wraps to a random location
              if(respawn){
                x = random(0, max_width);
              }
          }
          if(y > max_width){
              y = 0;
              if(respawn){
                x = random(0, max_width);
              }
          }
          if(x < 0){
              x = max_width;
              if(respawn){
                y = random(0, max_width);
              }
          }
          if(x > max_width){
              x = 0;
              if(respawn){
                y = random(0, max_width);
            }
        }
    }
}

// a 4-LED ball moves across the screen, bound by edges
void Star::singleDot(int y_diff, int x_diff){
    calculateMove(y_diff, x_diff, 6, true, false); // max_width is 6 because this 'particle' is twice as large
    lc.clearDisplay(0);
    lc.setLed(0,x, y, true);
    lc.setLed(0,x+1, y, true);
    lc.setLed(0,x, y+1, true);
    lc.setLed(0,x+1, y+1, true);
    delay(wait);
}

// a horizontal and vertical line move independently with wraparound
void Star::twoLines(int y_diff, int x_diff, boolean invert){
    calculateMove(y_diff, x_diff, 7, false, false);
    lc.clearDisplay(0);

    // create negative solid line along x and y coordinates
  if(invert){
    for (int i = 0; i < 8; i++){
        if(i == x){
            lc.setRow(0,i,B00000000);
        }
        else{
            lc.setRow(0,i,B11111111);
        }
    }
    lc.setColumn(0,y,B00000000);
  }
  // create solid line along x and y coordinate
  else {
    lc.setRow(0,x,B11111111);
    lc.setColumn(0,y,B11111111);
  }
  delay(wait);
}

int patternChoice = 0;
int numberPatterns = 5;
const int starCount = 7;
Star* stars = new Star[starCount];
boolean shutdownMode = false;

void setup(){
  Serial.begin(9600);
  lc.shutdown(0,false);  // Wake up displays
  lc.setIntensity(0,5);  // Set intensity levels
  lc.clearDisplay(0);  // Clear Displays

  accel.powerOn();
  accel.setRangeSetting(4);
  accel.setActivityXYZ(1, 1, 1);
  accel.setActivityThreshold(30);
  accel.setInactivityXYZ(1, 1, 1);
  accel.setInactivityThreshold(75);
  accel.setTimeInactivity(30);

  // setting tap detection
  accel.setTapDetectionOnXYZ(0, 0, 1);
  accel.setTapThreshold(50);
  accel.setTapDuration(15);
  accel.setDoubleTapLatency(80);
  accel.setDoubleTapWindow(200);
  accel.InactivityINT(1);
  accel.ActivityINT(1);
  accel.doubleTapINT(1);
}

void loop(){
  int x_diff,y_diff,z;
  accel.readAccel(&x_diff, &y_diff, &z);

  // check for interrupts
  byte interrupts = accel.getInterruptSource();

  if(accel.triggered(interrupts, ADXL345_INACTIVITY) && !shutdownMode){
    Serial.println("*** INACTIVITY ***");
    lc.shutdown(0,true);
    shutdownMode = true;
  }

  if(accel.triggered(interrupts, ADXL345_ACTIVITY) && shutdownMode){
    Serial.println("*** ACTIVITY ***");
    lc.shutdown(0,false);
    shutdownMode = false;
  }

  if(accel.triggered(interrupts, ADXL345_DOUBLE_TAP)){
    Serial.println("*** DOUBLE TAP ***");
    patternChoice++;
  }

  byte currentPattern = patternChoice % numberPatterns;
  if(currentPattern == 4) {
    barField(y_diff, x_diff);
  }
  else if(currentPattern == 3){
    starField(y_diff, x_diff);
    }
  else if(currentPattern == 2){
    stars[0].twoLines(y_diff, x_diff, false);
    }
  else if(currentPattern){
    stars[0].twoLines(y_diff, x_diff, true);
    }
  else {
    stars[0].singleDot(y_diff, x_diff);
  }
}

// random blinking starfield, star respawns on opposite side when it passes boundary
void starField(int y_diff, int x_diff){
  lc.clearDisplay(0);
  lc.setIntensity(0,1);
  for(int n = 0; n < starCount; n++) {
    stars[n].calculateMove(y_diff, x_diff, 7, false, true);
    lc.setLed(0,stars[n].x, stars[n].y, true);
  }
  delay(100);
  lc.setIntensity(0,5);  // blink effect
  delay(100);
}

void barField(int y_diff, int x_diff){
  byte numberLines = 1;
  lc.clearDisplay(0);
  for(int n = 0; n < numberLines; n++ ) {
    stars[n].calculateMove(y_diff, x_diff, 7, false, false);
    lc.setRow(0,stars[n].x,B11111111);
    lc.setColumn(0,stars[n].y,B11111111);
  }
  delay(200);
}
Colorduino Time
I picked up a Colorduino for an RGB Matrix I already had, got it working, and wanted to see if I could incorporate it in this project. It’s much bigger than the red matrix and a lot more patterns are possible. The first iteration of this is to have the original Nano + Accelerometer handle all inputs and communicate the pattern data to the Colorduino.
We must abandon the LedControl library here. The current sketch uses object methods setLed, setRow, setColumn, clearDisplay, and shutdown. Reviewing Lincomatic’s Colorduino library, we have a SetPixel method that takes x, y, r, g, b parameters and a ColorFill method that will fill the entire matrix with one color. Equivallents end up being:
Colorduino.ColorFill(0,0,0); // lc.clearDisplay(0);
Colorduino.SetPixel(p->x, p->y, 255, 255, 255);  // lc.setLed(0,p->x, p->y, true);
From this, we can set up some useful helpers to replicate the functions we had in the previous library.
void clearDisplay(){
  Colorduino.ColorFill(0,0,0);
  Colorduino.FlipPage();
}

 // compensate for relative intensity differences in R/G/B brightness
// array of 6-bit base values for RGB (0~63), maps to input range 1 to 10
void setBrightness(int bright){
  int adjustedBright1 = map(bright, 0, 10, 0, 36);
  int adjustedBright2 = map(bright, 0, 10, 0, 63);
  unsigned char whiteBalVal[3] = {adjustedBright1, adjustedBright2, adjustedBright2};
  Colorduino.SetWhiteBal(whiteBalVal);
}

void setLed(int x, int y, colorRGB color){
  Colorduino.SetPixel(x, y, color.r, color.g, color.b);
}

void setColumn(int y, colorRGB color){
  for (int i=0; i < 8; i++){
    setLed(i, y, color);
  }
}

void setRow(int x, colorRGB color){
  for (int i = 0; i < 8; i++){
    setLed(x, i, color);
  }
}
We also need an easy way to store RGB data. Structures are commonly used for this.
struct colorRGB {
  byte r;
  byte g;
  byte b;
};

colorRGB white = {255, 255, 255};
colorRGB red = {255, 0, 0};
Some of the patterns are now redundant (inverted bars) or don’t work (stars). There should be a way to dim individual LEDs for the blinking star effect and looking at SetWhiteBal may provide a clue, but I have no idea on that one. On the plus side the trailing comet idea can now be achieved with slightly different shades of color.
#include <Colorduino.h>
#include <SparkFun_ADXL345.h>
ADXL345 accel = ADXL345();
int displayDelay = 100;

// RGB data
struct colorRGB {
  byte r;
  byte g;
  byte b;
};

colorRGB black = {0,0,0};
colorRGB blue = {0,0,255};
colorRGB cyan = {0,255,255};
colorRGB green = {0,255,0};
colorRGB magenta = {255,0,255};
colorRGB navy = {2, 8, 91};
colorRGB orange = {255, 165, 0};
colorRGB purple = {128,0,128};
colorRGB red = {255, 0, 0};
colorRGB teal = {0,128,128};
colorRGB white = {255, 255, 255};
colorRGB yellow = {255, 255, 0};

// Colorduino helper functions
void clearDisplay(){
  Colorduino.ColorFill(0,0,0);
  Colorduino.FlipPage();
}

void colorFill(colorRGB color){
  Colorduino.ColorFill(color.r, color.g, color.b);
  Colorduino.FlipPage();
}

void setLed(int x, int y, colorRGB color){
  Colorduino.SetPixel(x, y, color.r, color.g, color.b);
}

 // compensate for relative intensity differences in R/G/B brightness
// array of 6-bit base values for RGB (0~63), maps to input range 1 to 10
void setBrightness(int bright){
  int adjustedBright1 = map(bright, 0, 10, 0, 36);
  int adjustedBright2 = map(bright, 0, 10, 0, 63);
  unsigned char whiteBalVal[3] = {adjustedBright1, adjustedBright2, adjustedBright2};
  Colorduino.SetWhiteBal(whiteBalVal);
}

void setColumn(int y, colorRGB color){
  for (int i=0; i < 8; i++){
    setLed(i, y, color);
  }
}

void setRow(int x, colorRGB color){
  for (int i = 0; i < 8; i++){
    setLed(x, i, color);
  }
}

// Particle class
class Star {
  public:
    int x = random(0, 7);
    int y = random(0, 7);
    void calculateMove(int y_diff, int x_diff, int max_width, boolean constrained, boolean respawn);
    void singleDot(int y_diff, int x_diff);
    void twoLines(int y_diff, int x_diff);
};

void Star::calculateMove(int y_diff, int x_diff, int max_width, boolean constrained, boolean respawn){
  if(y_diff >= 1 || y_diff <= -1){
    if(y_diff > 1){
       y++;
    }
    else{
      y--;
    }
  }
  if(x_diff >= 1 || x_diff <= -1){
    if(x_diff > 1){
      x++;
        }
    else{
      x--;
      }
    }

  // if the pixel is constrained it stops at the edge
      if(constrained){
        y=constrain(y,0,max_width);
        x=constrain(x,0,max_width);
      }
  // if the pixel is not constrained it wraps to the opposite side...
      else {
          if(y < 0){
              y = max_width;
  // ....and if it respawns, it wraps to a random location
              if(respawn){
                x = random(0, max_width);
              }
          }
          if(y > max_width){
              y = 0;
              if(respawn){
                x = random(0, max_width);
              }
          }
          if(x < 0){
              x = max_width;
              if(respawn){
                y = random(0, max_width);
              }
          }
          if(x > max_width){
              x = 0;
              if(respawn){
                y = random(0, max_width);
            }
        }
    }
}

// a 4-LED ball moves across the screen, bound by edges
void Star::singleDot(int y_diff, int x_diff){
    calculateMove(y_diff, x_diff, 6, true, false); // max_width is 6 because this 'particle' is twice as large
    colorFill(teal);
    setLed(x,y,orange);
    setLed(x+1,y,orange);
    setLed(x,y+1,orange);
    setLed(x+1,y+1,orange);
    Colorduino.FlipPage();
    delay(displayDelay);
}

// a horizontal and vertical line move independently with wraparound
void Star::twoLines(int y_diff, int x_diff){
    calculateMove(y_diff, x_diff, 7, false, false);
    colorFill(red);
    setRow(x, cyan);
    setColumn(y, cyan);
    Colorduino.FlipPage();
    delay(displayDelay);
}

int patternChoice = 0;
int numberPatterns = 5;
const int starCount = 7;
Star* stars = new Star[starCount];
boolean shutdownMode = false;

void setup(){
  Serial.begin(9600);
  Colorduino.Init(); // initialize the board
  setBrightness(5); // I've found the matrix has difficulty with full brightness

  accel.powerOn();
  accel.setRangeSetting(4);
  accel.setActivityXYZ(1, 1, 1);
  accel.setActivityThreshold(30);
  accel.setInactivityXYZ(1, 1, 1);
  accel.setInactivityThreshold(75);
  accel.setTimeInactivity(30);

  // setting tap detection
  accel.setTapDetectionOnXYZ(0, 0, 1);
  accel.setTapThreshold(50);
  accel.setTapDuration(15);
  accel.setDoubleTapLatency(80);
  accel.setDoubleTapWindow(200);
  accel.InactivityINT(MISO);
  accel.ActivityINT(MISO);
  accel.doubleTapINT(MISO);
}

void barField(int y_diff, int x_diff){
  byte numberLines = 8;
  colorFill(yellow);
  for(int n = 0; n < numberLines; n++ ) {
    if (n % 2) {
      stars[n].calculateMove(y_diff, x_diff, 7, false, false);
      setRow(stars[n].x, red);
      setColumn(stars[n].y, red);
    }
  }
  Colorduino.FlipPage();
  delay(displayDelay);
}

void loop(){
  int x_diff,y_diff,z;
  accel.readAccel(&x_diff, &y_diff, &z);

  // check for interrupts
  byte interrupts = accel.getInterruptSource();
  if(accel.triggered(interrupts, ADXL345_INACTIVITY) && !shutdownMode){
    Serial.println("*** INACTIVITY ***");
    setBrightness(0);
    shutdownMode = true;
  }

  if(accel.triggered(interrupts, ADXL345_ACTIVITY) && shutdownMode){
    Serial.println("*** ACTIVITY ***");
    setBrightness(5);
    shutdownMode = false;
  }

  if(accel.triggered(interrupts, ADXL345_DOUBLE_TAP)){
    Serial.println("*** DOUBLE TAP ***");
    patternChoice++;
  }
  clearDisplay();

  byte currentPattern = patternChoice % numberPatterns;
  if(currentPattern == 4) {
    barField(y_diff, x_diff);
  }
  else if(currentPattern == 3){
    starField(y_diff, x_diff);
    }
  else if(currentPattern == 2){
    comets(y_diff, x_diff);
    }
  else if(currentPattern){
    stars[0].twoLines(y_diff, x_diff);
    }
  else {
    stars[0].singleDot(y_diff, x_diff);
  }
}

void comets(int y_diff, int x_diff){
  int cometCount = starCount/2;
  colorFill(navy);
  for(int n = 0; n < cometCount; n++) {
    stars[n].calculateMove(0, x_diff, 7, false, true);
    setLed(stars[n].x, stars[n].y, yellow);
    setLed(stars[n].x-1, stars[n].y, orange);
    setLed(stars[n].x-2, stars[n].y, red);
  }
  Colorduino.FlipPage();
  delay(displayDelay);
}

// random blinking starfield, star respawns on opposite side when it passes boundary
void starField(int y_diff, int x_diff){
  colorFill(navy);
  for(int n = 0; n < starCount; n++) {
    stars[n].calculateMove(y_diff, x_diff, 7, false, true);
    setLed(stars[n].x, stars[n].y, yellow); ;
  }
  Colorduino.FlipPage();
  delay(displayDelay);
}
To I2C or not to I2C?
Colorduinos are commonly paired with a leader Arduino, which sends commands via serial or I2C. The Colorduino has its own ATMega chip however, and it is easier to program it directly, so I wanted to try adding the GY-291 accelerometer to the Colorduino. I spent some time trying to determine if the GY-291 pins were all 5V tolerant, not just VCC/GND, and after having difficulty using a logic level converter I figured screw it and just plugged the thing in. It works so far, but here’s the obligatory warning: you will burn your accelerometer if it isn’t 5V tolerant. Hopefully, if you order parts via slow boat, you are ordering extra sensors anyway. I needed one interrupt pin for gesture control and the Colorduino has an unused external interrupt pin, however, it isn’t broken out. GY-291’s INT1 can accept any pin, so I tested with the ICSP headers since I can easily reference those. The ICSP headers are blocked by the matrix when it’s attached, so wire-wrapping is a good choice.
Future Versions - Portability, Power, Accelerometer Pong, and Finally… Sand?
Something that has eluded me until this point is my original inspiration: LED sand. In all the previous patterns, it doesn’t matter where the stars are because they don’t interact with each other. But for a sand effect we will need some kind of collision detection. We’ll also need a way to make the sand fall at variable times, otherwise we’ll just have one big block of sand moving back and forth. electronstogo’s LED Sand in a Box is a starting point. Another pattern could be a liquid-sorta physics like SWJTUyuhui’s Gravity LED Matrix. Adafruit has an incredibly neat LED Sand setup, but the LED board for the smaller one is no longer available and the big one is much larger and more expensive than I wanted for this project. I have poked at this problem a little but my collision code is pretty wonky so far.
Another issue will be portability. The first version was powered by a convenient but inefficient 9V battery, but the Colorduino requires voltage between 6.2V to 7.5V, with the warning that anything over 7V may lead to overheating. A step-down would be needed for a 9V battery or 7.4V lipo.
I’ve also been thinking about setting up something where 2 people can play gesture-pong. This is not a new idea but the implementations I’ve seen have involved using the Arduino as a gesture controller. I would like each player to have a handheld display that shows the ball when it is in their court. I’m honestly not too keen to pick up another Colorduino, but I haven’t seen any single-color 5mm matrixes with modules. A 16x24 lattice might be a good size, but it’s driven by HT1632C, would have to check out library support etc. Connecting several MAX7219-driven matrixes might be a possibility. At any rate, it ends up being a completely different project rather than a natural extension of this one.
Future Reference
- https://learn.adafruit.com/animated-led-sand/code
- https://learn.adafruit.com/digital-sand-dotstar-circuitpython-edition/code
- https://www.silabs.com/community/blog.entry.html/2016/03/21/chapter_10_3_contro-U2mS
- https://www.brainy-bits.com/arduino-max7219-scrolling-text-matrix/
- https://github.com/Electromondo-Coding/ColorduinoScrollerLibrary