~/contents
When my brother alerted me the Playstation Classic was on sale for $20 I picked one up. I didn’t expect much from the stock presentation, and didn’t get much, but after wrangling with the Orange Pi for emulation I appreciated the value of a single-board computer already packed in a tidy box with controllers.
This project is often represented as plug-and-play, but for some users that’s not the case. There are several hardware issues that can make emulation non-trivial. The chief issues are the USBs and the power supply. Rather infamously, Sony declined to include a power adapter with the device. Note a powered USB hub will make this project much easier.
I have decided to preserve the entirety of my hacking journey as it happened, but be advised this process was complicated for me because I am an idiot who apparently does not know how to extract a .zip to root. EXTRACT TO ROOT.
Emulation Software
Your software choices are Autobleem, RetroBoot (on Reddit), and Bleemsync. There is now a version of Autobleem that includes RetroBoot, allowing you to emulate additional consoles. Autobleem and Retroboot both operate off the USB drive and do not modify the system. Bleemsync does modify the PSC, and the benefit of this is you won’t have to worry about USB compatibility once you’ve got Bleemsync loaded on the system as it enables OTG support, allowing you to use an OTG adaptor on the rear micro USB port. You can also use a combination of these, as I ended up doing.
In its current state BleemSync is a little fiddly when it comes to adding games. The ROM manager pbPSCReAlpha simplifies adding PSX games.
USB Drives
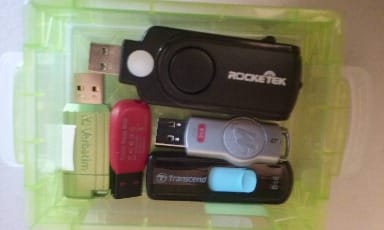
The PSC has current limitors that interfere with newer USB drives. It is recommended you use a USB 2.0 drive or older, and even then there is a great deal of uncertainty as to which USB drives can be used directly. There is a list of a few known compatible/incompatible drives, but there is no guarantee devices on the list will work. I had a Sandisk Cruzer Blade 16GB on hand and it did not seem to work. I also tried 8GB Transcend, a 8GB Verbatim, and a 2GB Memorex Travel Drive Mini.
Once you have a drive (or a handful) to try out, you can clean and reformat them easily from the Windows command line using diskpart.
C:\Windows\system32>diskpart
DISKPART> list disk
  Disk ###  Status         Size     Free     Dyn  Gpt
  --------  -------------  -------  -------  ---  ---
  ***
  Disk 3    Online         7651 MB      0 B
DISKPART> select disk 3
Disk 3 is now the selected disk.
DISKPART> clean
DiskPart succeeded in cleaning the disk.
DISKPART> create partition primary
DiskPart succeeded in creating the specified partition.
DISKPART> select partition 1
Partition 1 is now the selected partition.
DISKPART> active
DiskPart marked the current partition as active.
DISKPART> format fs=fat32 quick
100 percent completed
DiskPart successfully formatted the volume.
Rename the drive SONY, all capitals. Unplug the power, plug the USB drive into the second controller port, and power on the device. When you hit power, the green indicator light will come on, and the PSC will hopefully boot from USB and either run AutoBleem/RetroBoot or install the BleemSync payload.
Troubleshooting
If that worked for you, congratulations! If it didn’t work for you, it may be because of the current limits on the USBs, and you are not alone in that regard. The USB ports supply enough power for peripherals, but most USB drives require more power. Pat Hartl has written an incredibly informative post on r/PlaystationClassic about this issue. He offers three solutions:
- Find a USB that works. This is simply trial and error.
- Peripheral workaround: Use a powered USB hub to supply additional power to the USB drive, and this has the added benefit of allowing you to use more than one controller.
- Hardware mod: Mod the PSC by shorting the resistors on the USB ports.
Trying USB Drives
The easiest solution would be to get a USB that boots. I only needed to load BleemSync once to enable OTG, after that I could use OTG to bypass the USB port issue entirely. I dug up every old drive I could find but all failed to boot. While doing this, I came across this post by Redditor BL4Z3D247 recommending MiniTool Partition Wizard Free 11 to format the drives. Tutorial here. Some users reported success when other methods failed, so I figured why not and I went ahead and reformatted all the USBs I was messing with. Be mindful MiniTool wants to install McAfee Antivirus, which you DO NOT want on your computer, but you can opt out. I used MiniTool’s partition management to delete and reformat as FAT32 on each drive. I don’t think MiniTool is a magical solution. I suspect users are having issues with other formatting software not showing them hidden partitions or not removing them entirely (or not extracting the files to root, ahem). I noticed diskpart could not see a U3 partition, for instance.
Drives with U3
Marlin dug up an old 2G Memorex travel drive that seemed like an excellent contender. Diskpart couldn’t find it, but Windows Explorer could, because there was a weird extra partition I couldn’t wipe called U3 System. It turns out this is proprietary software intended to make the user’s life harder. I used U3 Tool to remove it by placing the .exe in the root and targeting the partition by drive name
u3-tool.exe -p 0 gist
Once this was done the weird partition was gone and diskpart could list the disk as usual.
MicroSD Adapters
I saw posts here and there about using MicroSD adapters to get around the USB problem.
Hardware Mod
I don’t have a powered hub so I decided to try modding the board. Pat Hartl helpfully provided an article and a YouTube tutorial demonstrating how to do this with a soldiering iron and a conductive ink pen. It sounds like some people have had limited luck with the latter. I personally consider this soldering task difficult and would only recommended for someone who has experience and a good iron. The resistors are incredibly tiny and the angle is difficult to get and you need a fine point iron tip or chisel.
I made several attempts using tinned copper wire and a solder bridge but I seemed to be unable to create a strong enough connection to bypass current limiting even when the restistors appeared to be properly shorted. I now know I probably did short the resistors correctly, my failure to boot was related to a different issue. At the time this was disapointing and a little confusing, so I looked into other options. Redditor ikenbe states he was able to use mechanical pencil lead to bridge the resistors. I tried this, and it did not work for me. Additionally, I found another thread where a user was chastised for using graphite for this purpose. (oops)
I had my fill of soldering, but there are several documented options. makar1 has posted a method that adds a resistor. Users also report losing the resistors entirely and being able to use the board if all four points are still bridged.
The good news is after a lot of abuse, my PSC still worked, so it was time to give the poor board a rest and move on to peripherals. I ordered a Macally Powered USB 2.0 Hub, which is one recommended on r/PlaystationClassic.
Suddenly, A Realization
My powered hub came in the mail and I was ready to finally make this project happen. I rolled up my sleeves, checked my Sandisk Cruzer one last time… and realized something. I almost could not believe my eyes when I saw what I had done.

When I extracted BleemSync, and all the other .zips, to the USB flash drive, I did not extract them to root. They are in a filename folder. Hands trembling, I moved the software to root where it belonged, whispered a little prayer, then plugged in the USB…
And BleemSync immediately started.
After ALL that troubleshooting, the multiple soldering attempts which probably were successful, after checking the current on various drives and puzzling over why the Sandisk Cruzer wasn’t working when it clearly seemed it should… I found I could not boot to USB because of a small, but incredibly significant, user error.
Tears spilled my cheeks. I wept, both in gratitude and despair. My journey was nearing its end, and while I am stupid, I also have a hacked Playstation Classic with OTG support so I don’t give a crap what anyone thinks about me.
Using BleemSync and AutoBleem
The different Emulators have different front-end options. Since I’ll be the only one using this emulator I don’t have to worry about the front-end too much. BleemSync has a lot of options, many of which are overkill for me, and I didn’t want to have to manage things like cover images. I decided to try AutoBleem and RetroBoot for ROM management, as I like the AutoBleem carosel and it seemd a bit easier to load and manage other consoles. Patton Play’s has a YouTube tutorial, How to set up OTG Support on the Playstation Classic with Autobleem and Retroboot!, and you can find others as well. Basically, go through the BleemSync process as you normally would, installing BleemSync and the kernel. Once you’ve done that, put your BleemSync drive aside and extract AutoBleem to a USB drive (ROOOOOOOT) as you normally would. You’ll access it from your OTG drive using a OTG USB adapter. Plug it in, and after the stock PSC screen the AutoBleem loading screen will appear.
Adding PSX games and ECM to BIN
To add PSX games you create a folder with the game name in /Games and add the .bin, .cue, or .pbp files. I’ve been meaning to get back to Harmful Park, a somewhat obscure Japanese cute-em-up that had been a little finicky to emulate on PC, so I was curious to see how AutoBleem would handle it. The files I have are a .cue and a .bin.ecm, and AutoBleem could not detect the .bin.ecm, whic is a compressed file. ECM tools can be found on the Internet Archive. In Windows Explorer, grab your .ecm file, drag it to unecm.exe, and open. You’ll get a window showing the conversion process, and an uncompressed .bin file will be added to your folder.
PERFECT! AutoBleem provides the correct cover art and game data, the game runs great. I normally play it through SteamLink and was pretty jazzed to be able to play 2P on the PSC.
Adding Other Consoles
You can simply add folders for these consoles to the /roms folder (/roms/SNES, etc.). BIOS usually go in retroarch/system/
I play a few shmups on MAME and I was curious to see how the PSC would handle them. Patton Plays has a YouTube tutorial, How to play Arcade games on your Playstation Classic. PSC won’t run 3D arcade games, but others from the 0.78 romset can be put in roms/MAME. On the PSC, load RetroArch and Import Content, and scan the MAME directory. Patton recommends setting up a MAME playlist to play to the km_MAME 2003 Xtreme. BIOS go in retroarch/system or (in the case of neogeo.zip) in the roms folder. I tried Mame2003 with different Neo Geo BIOS, but no luck. I think I’ll stick to PSX for this one.
Controller Mapping
Autobleem will only let you map a controller once. If you make a mistake, you can delete the .ini file at:
SONY://Autobleem/bin/autobleem/gpmapping/
Autobleem cannot detect L2 and R2 on the XBox 360 controller. I can switch to RetroArch and use that controller with no problem.
Verdict
Playstation Classic: $20 USB Hub I didn’t need: $15 OTG USB Adapters: $8 Sweat and tears: Salt/moisture, dignity A million ancient USB drives, infused with forgotten magics: $30 in Aught dollars, not adjusted for inflation Harmful Park in my comfy den: Priceless.